


What is Azure Resources Manager (ARM)?
Azure Resource Manager is the deployment and management service for Azure. It provides a management layer that enables you to create, update, and delete resources in your Azure account. You use management features, like access control, locks, and tags, to secure and organize your resources after deployment.
Key service characteristics
- Deployment and Management service
- Centralized layer for resource Manager
How does it work?
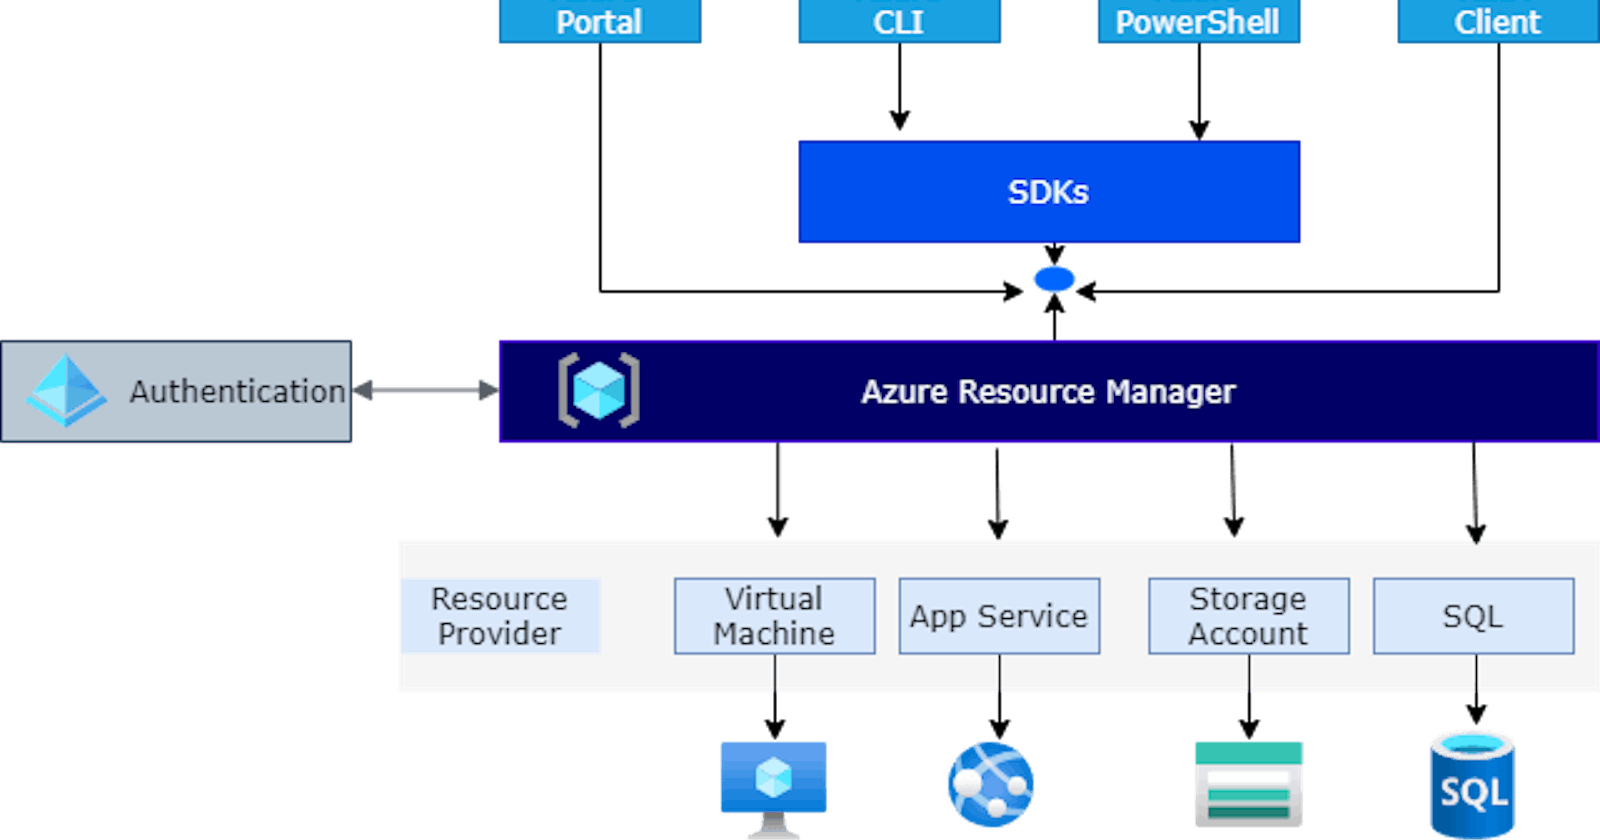
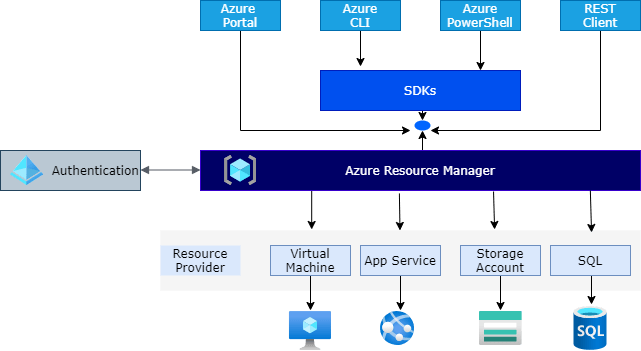
First, let's talk about how we can deploy resources in Azure.

There are several ways of deploying resources to Azure such as Azure Portal, Azure PowerShell, Azure CLI, rest clients.
For Azure PowerShell and Azure CLI, we use SDKs, however, all those interfaces are communicating with the single Azure Resource Manager endpoint which is the centralized layer.
It is secured by default because it is secured with Active Directory.
Once the request is received, the resource manager talks to Resource Provider. Every single resource in Azure has its own Resource Provider and that resource provider handles everything related to that specific resource.
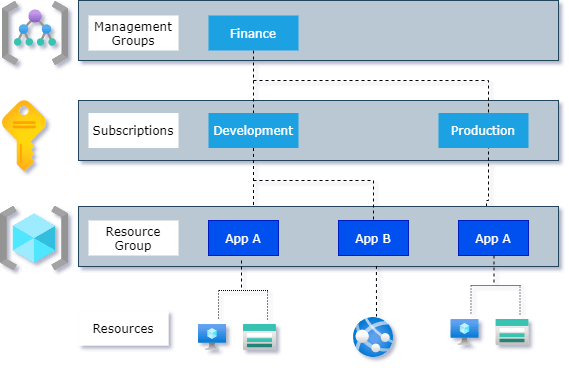
In Azure, everything is managed in hierarchical scope and the scope goes from the management groups to the lowest level of Resources.
ARM templates overview.
They are the unified language for you to manage resources in Azure using a declarative approach using very simple files.
HOW IT WORKS
The way it works is very simple. Imagine you have a resource group in which you have a virtual machine and a storage account. You can create a very simple template to deploy all that in a single go.
The format of the file is JSON. The format has standard properties of which some are the same and some are mandatory.
The template will look like this.
{
  "$schema": "https://schema.management.azure.com/schemas/2019-04-01/deploymentTemplate.json#",
  "contentVersion": "1.0.0.0",
  "parameters": {},
  "functions": [],
  "variables": {},
  "resources": [
        {

            /* Resource A */
        },
        {
            /* Resource B */
        }

  ],
  "outputs": {}
}
$schema: Describes properties available in the template.
contentVersion: Versioning system in the template for development purpose. If you are using git for versioning, then this field is not important to keep it up-to-date.
parameters: This field is optional but if you want to parameterize your template then you can use this to pick up some input parameters for the template.
variables: If you want to calculate something dynamically then you can use variables section to calculate some dynamic properties during the execution of the template based on your input parameters and other variables.
resources: The most important section of the template. It's an Array of JSON objects, where each objects describes the service that is going to be deploying and you can multiple resources deployed using the single template.
output: This section allows you to return some properties and information from the template execution. This is useful for chaining multiple templates together. For example, you can capture the Id of the component you have created and pass that to another template.
function: You can define expressions here and reuse across your template.
Benefits of using ARM Templates
- Infrastructure as Code (IaC), Policy and Roles as Code
- Declarative syntax (what is it)
- Repeatable results
- Orchestration
- Built-in Validation
- Modular files
- Tracked templates
- Many authoring tools
- Functions and expressions
- Linked and nested templates
- Dependencies
- References
- Export
- Loops
- Conditions
When to use ARM Templates
- Application development and maintenance
- CI/CD scenarios
Azure governance
Policies
- Roles
- Etc.
The most typical and common scenario is application development and maintenance. It can also be used for CI/CD of those applications and it is very helpful when you are moving resources across multiple environments that ensure consistent results.
If you are an administrator for managing resources, you can use ARM templates for governance. You can define policies, roles, and many more.
By now, we have some concepts about the Azure Resource Manager, now let’s dive into the demo.
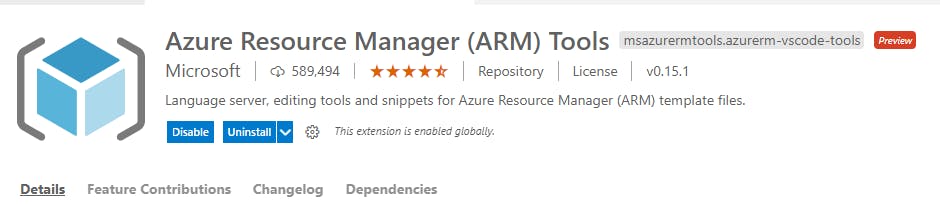
I will be using VS Code for editing files and deploying them to Azure. There is one extension from Microsoft called Azure Resource Manager (ARM) tools. I am using this extension in VS Code because it gives great IntelliSense and snippets to work with.
{
  "$schema": "https://schema.management.azure.com/schemas/2019-04-01/deploymentTemplate.json#",
  "contentVersion": "1.0.0.0",
  "parameters": {},
  "functions": [],
  "variables": {},
  "resources": [
{
    "name": "storageaccount1",
    "type": "Microsoft.Storage/storageAccounts",
    "apiVersion": "2019-06-01",
    "tags": {
        "displayName": "storageaccount1"
    },
    "location": "[resourceGroup().location]",
    "kind": "StorageV2",
    "sku": {
        "name": "Standard_LRS",
        "tier": "Standard"
    }
}
  ],
  "outputs": {}
}
As we have hardcoded the name of the resource, which is not the best approach because we need to update our templates several times. So, let’s add parameters in our template. We can add parameters for storage name as below.
"parameters": {
      "storageName": {
           "type":"string",
        "minLength":3,
        "maxLength":24
      }
  }
We can also add validation. Now we have our parameters ready, we can get the value by calling function. To call function in ARM Templates, we can call the function inside [] brackets. The function for the parameters is called parameters which takes the name of the parameter as argument.
"name": "[parameters('storageName')]",
Now, we need to provide the parameter name in the PowerShell script.
We can also add parameters for list of allowed values for storage SKU, which will run validation before it gets deployed.
"storageSKU": {
      "type": "string",
      "allowedValues": [
        "Standard_LRS",
        "Standard_GRS",
        "Standard_RAGRS",
        "Standard_ZRS",
        "Premium_LRS",
        "Premium_ZRS",
        "Standard_GZRS",
        "Standard_RAGZRS"
      ]
    }
The final template will look like this
{
  "$schema": "https://schema.management.azure.com/schemas/2019-04-01/deploymentTemplate.json#",
  "contentVersion": "1.0.0.0",
  "parameters": {
    "storageName": {
      "type": "string",
      "minLength": 3,
      "maxLength": 24
    },
    "storageSKU": {
      "type": "string",
      "allowedValues": [
        "Standard_LRS",
        "Standard_GRS",
        "Standard_RAGRS",
        "Standard_ZRS",
        "Premium_LRS",
        "Premium_ZRS",
        "Standard_GZRS",
        "Standard_RAGZRS"
      ]
    }
  },
  "functions": [],
  "variables": {},
  "resources": [
    {
      "name": "[parameters('storageName')]",
      "type": "Microsoft.Storage/storageAccounts",
      "apiVersion": "2019-06-01",
      "tags": {
        "displayName": "storageaccount1" // optional
      },
      "location": "[resourceGroup().location]",
      "kind": "StorageV2",
      "sku": {
        "name": "[parameters('storageSKU')]",
        "tier": "Standard"
      }
    }
  ],
  "outputs": {}
}
storage.json
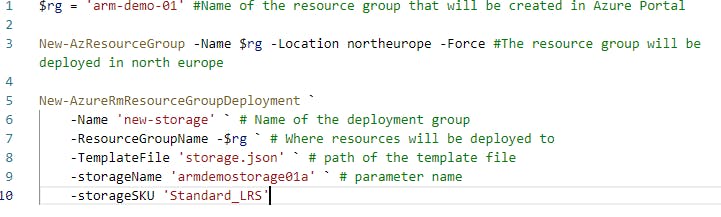
Now, you can create a PowerShell script to deploy the template like this.
$rg = 'arm-demo-01'
New-AzResourceGroup -Name $rg -Location northeurope -Force

New-AzResourceGroupDeployment `
    -Name 'new-storage' `
    -ResourceGroupName $rg `
    -TemplateFile 'storage.json' `
    -storageName 'armdemostorage01a' `
    -storageSKU 'Standard_LRS'
storage.ps1
Now, the template can be deployed using the terminal. Navigate to the folder where template file is stored. First connect to Azure account by typing the following command in the terminal.
Connect-AZAccount
Then, execute the PowerShell file.
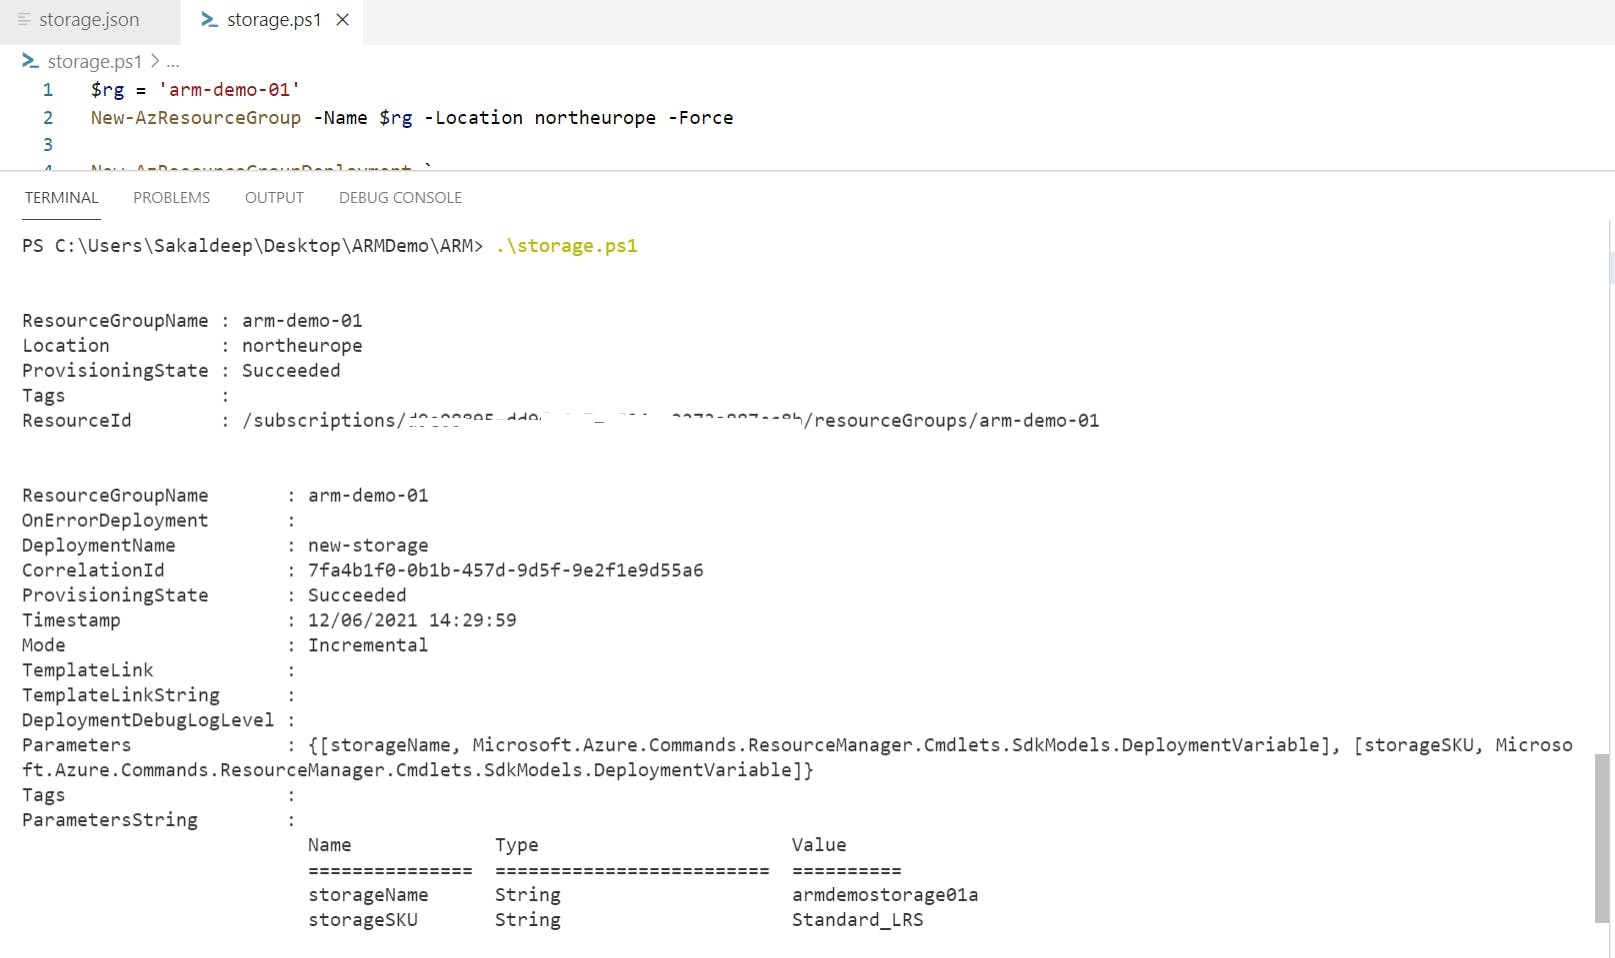
Now, you can see that the resource has been deployed successfully.
Additional resources:
[
Azure Quickstart Templates
Deploy Azure resources through the Azure Resource Manager with community contributed
templates to get more done. Deploy, learn, fork and contribute back.
 Microsoft Azure

](azure.microsoft.com/en-us/resources/templat..)
[
Azure/azure-quickstart-templates
Azure Quickstart Templates. Contribute to Azure/azure-quickstart-templates development by creating an account on GitHub.
 GitHubAzure
